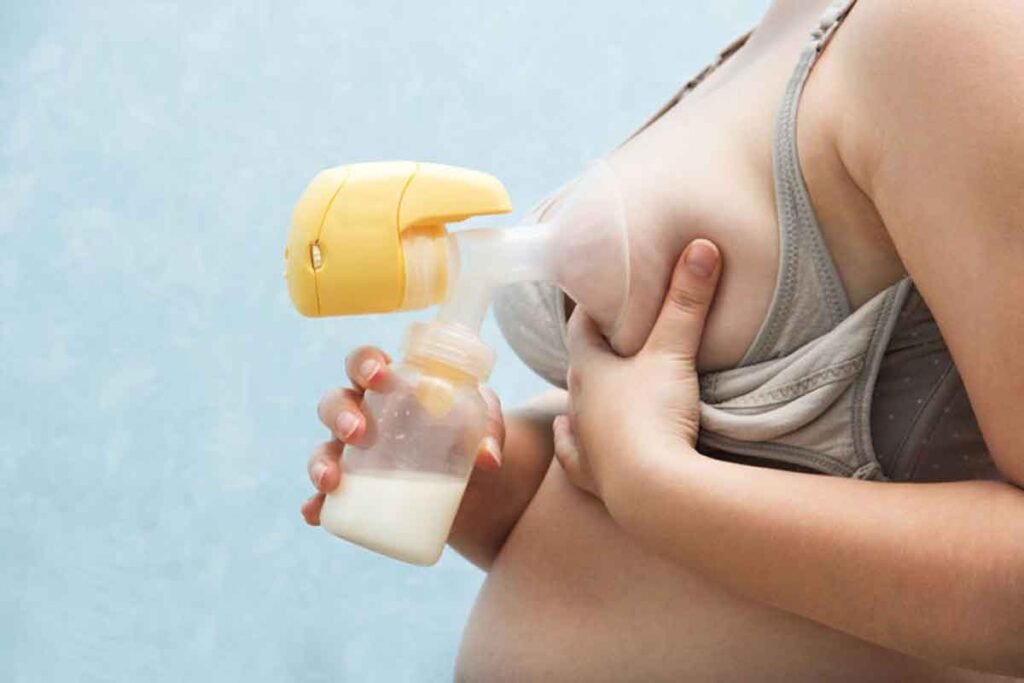
Are you a nursing mother? Or has a daughter who is nursing a baby right now? Then here’s a suggestion which will probably make you fall off your chair—make breast jewelry.
Ok, the suggestion may sound boneheaded. After all, who has ever heard of breast milk jewelry? You’ve heard of diamond jewelry, semi-precious stone jewelry, pearl, beaded, bangled, or whatever kind of jewelry there is in the market—but never of breast milk jewelry.
And if each type of jewelry you have has an attachment/meaning to you one way or the other, isn’t there a better way to have memorabilia of that time when you were cradling your baby close to your chest while feeding him/her your precious life-giving milk?
That’s right. There is no better memento of that unforgettable moment than breast milk jewelry.
This article is all about the subject and why it is good for you to have one.
What is Breast Milk Jewelry
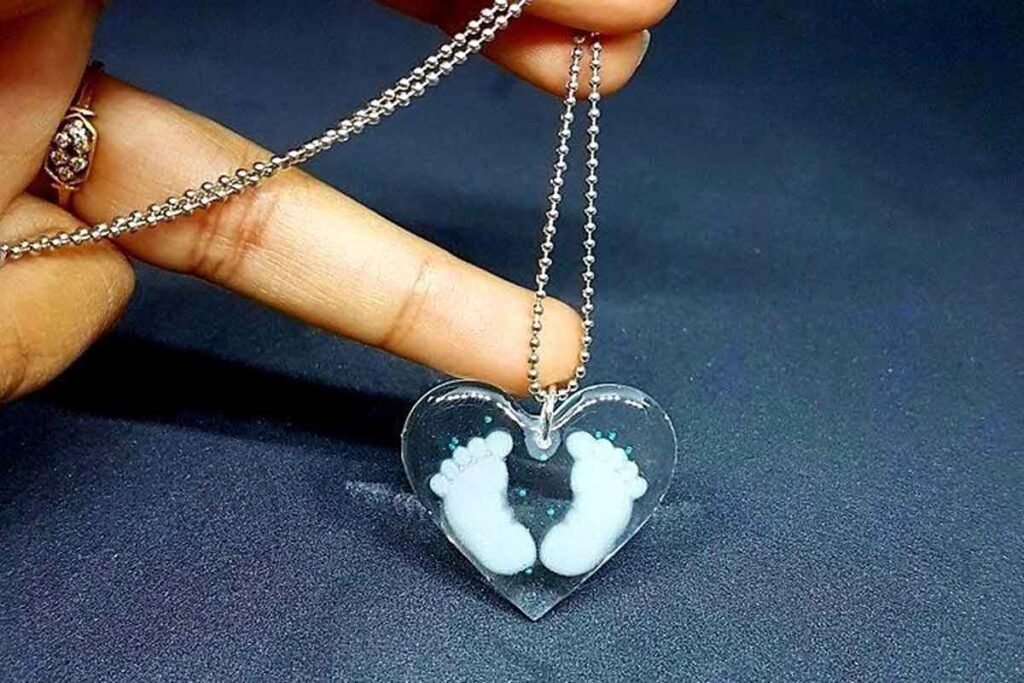
While traditional jewelry features an accent stone or centerpiece made of diamond or any one of the myriad colored gemstones, breast milk jewelry features a mother’s breast milk.
Instead of a precious or semi-precious stone, this type of jewelry uses pumped or expressed mother’s milk. While the trend isn’t new, more and more mothers wear them as a keepsake of their breastfeeding journey. It symbolizes the intimacy of the breastfeeding bond between Mom and child; a celebration of the amazing feat a mother has accomplished.
They come in various types, such as rings, lockets, pendants, and the popular European style beads. Breast milk jewelry is often set in pendants and lockets filled with resin, such as the one in this Amazon review. If used to fill jewelry holes, it is mixed with resin as a preservative. If used as a filler, they are usually shaped like trees, leaves, or hearts to represent love and life. A good example of this is sterling silver breast jewelry.
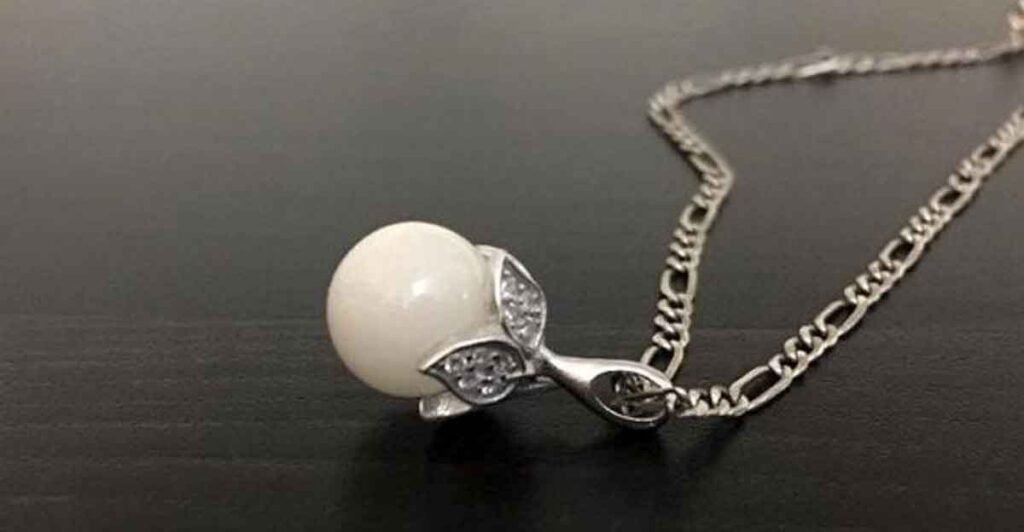
No one has laid claim on being the originator of this type of jewelry except for a short 2013 excerpt on NBC New York of two artists (one from Rhode Island, the other from South Carolina), who started the idea in 2007.
How do You Preserve Breast Milk for Jewelry?
Freshly pumped or pressed breast milk can stay in the open for four hours before it spoils. Inside the fridge, it can stay “fresh” for four days. Within this window, a preservation process must be applied if it is to be made into jewelry.
If you haven’t been into this and want to give it a try, the very first step is to have at least 5 ml of breast milk and place it into a sterile and clean plastic container—preferably the zip-lock type.
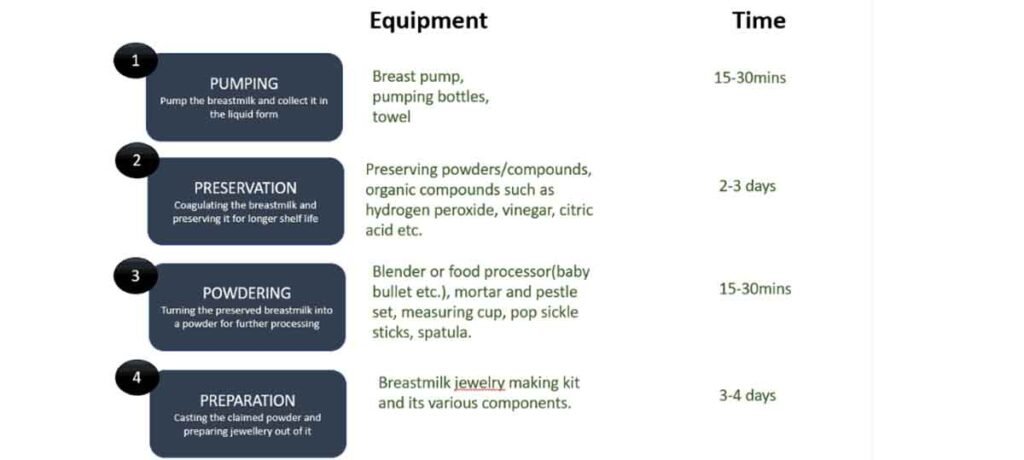
Note: Preparation is shown in more detail in How to Make Breast Milk Ring
Preserving breast milk for jewelry is a two-step process: Preservation and Powdering. To accomplish both without ruining the quality of the raw materials requires the following tools and equipment:
- a double boiler
- parchment paper
- preservation powder (buy a pack good for 5 ml breast milk)
- spoon
- popsicle stick/spatula
- stone or marble mortar and pestle
Preservation
Make sure all of the above are clean and placed within reach. Walking over to fetch something may affect the process somehow along the way.
Then follow these steps:
Step 1:
Fill the double boiler with just enough water. Then turn the heat on and set it at Medium to High.
Step 2:
While the water in the double boiler is heating up, make sure you have exactly 5 ml of breast milk and your preservation powder is just enough for that quantity. Too much or too little and your breast milk will not preserve properly.
Once the water has come to a boil, pour the 5 ml of raw breast milk into the top pan. Heating the breast milk can take a few minutes. Take note, however, that some breast milk heats up faster than others.
Keep stirring it up and watch for tiny bubbling around the edges and the appearance of “milk film” on the surface. The main purpose of heating the milk up is to kill whatever bacteria it may have, stabilize it, and make it better absorb the preservation powder.
Once the milk is hot enough, pour in the preservation powder and stir the mixture. At this point, you can turn down the heat a little bit.
Before we get on to the next step, here’s a bit of useful information about the preservation powder.
Properties of preservation powder
The preservation powder provides these three important properties to make breast milk jewelry ready:
- Protein extraction: the preservation powder contains citric acid, which triggers the extraction of milk protein from the liquid. This protein will later be used in the process.
- Disinfectant: as an organic substance, breast milk has a lot of organisms that can make it deteriorate over time. This is the reason why breast milk spoils if kept in the open for long periods of time.
- Bleaching agent: the color of breast milk is dependent on the diet (dyes and colors present in the food) of the mother. To make it look white—and perfect for jewelry purposes—needs bleaching chemicals contained in preservation powders.
Step 3:
Once the milk and preservation powder are mixed, start stirring it. Using the popsicle stick/spatula, scrape the bottom and sides of the pan to make sure nothing stays out of the mixture. At this point, you can see some changes in the mixture. Keep stirring it until it begins to look like porcelain clay.
Then turn off the heat.
Step 4:
Empty the mixture onto the parchment paper and spread it as thinly as possible. Then let it sit at room temperature for 18 to 24 hrs to evaporate all moisture.
Powdering
After drying out your breast milk dough, then comes powdering to make it jewelry-making ready. Follow these steps completely so there will be no mess-up downstream:
Step 1:
Peel off your breast milk dough from the parchment paper and crumble them with your fingers.
Step 2:
Then place a few pinches into the mortar and start grinding with the pestle in a circular, digging motion. Keep adding a few pinches as you go on grinding. Grind small amounts at a time and grind them to a fine powder.
Take note that wooden or metal mortar and pestle may discolor the breastmilk powder.
Step 3:
Once everything has been ground into a fine powder, put it into a fresh sheet of parchment paper. Then store it somewhere safe and allow it to air dry for another 24 – 48 hrs. The powder must be as dry as possible because it won’t handle well when the resin is added to it.
This is the first round of grinding.
Step 4:
This step is optional and needed only if you want your powder to have a smooth and opaque look.
After 24 – 48 hrs of drying, all moisture should have evaporated from your powder. This paves the way for the second round of grinding.
In the same manner as Step 2 above, place the powder pinch by pinch into the mortar and firmly grind it with a digging circular motion. Do this for 15 to 25 mins or as long as possible until it has the same consistency as a baby powder.
After this second round of grinding, put the powder into another sheet of parchment paper. Now you are ready to do the casting process—turning it into jewelry.
Why Do People Want Breast Milk Jewelry?
From a crack in the wall came this bit of jewelry wisdom, “Beautiful jewelry is meant to be worn, not put in a box; wear it when you go out, have fun with it.”
People want to buy jewelry because it’s fun to wear them, it has lasting value and it connects people across generations.
The same thing with breast milk jewelry—but on a much deeper level of fun, value, and connectivity.
People, especially women, want to wear breast milk jewelry to celebrate a time in their life when they felt most powerful; or to reflect on a moment that bonded them to their babies on a physical land nurturing level.
Other women want to have a memento of the hard work and perseverance in nursing their babies.
Then some lost their babies and the only physical thing they have left of their tragedy is the drop of milk preserved in jewelry form. It serves as an emotional bond between them and the loved one they lost.
It is a great way to commemorate the lovely journey of motherhood.
What is the Purpose of a Breast Milk Ring?
About 20 years ago, an innovative east coast Mom hit on the idea of mixing cured breast milk with acrylic resin. That paved the way for the entry of breast milk jewelry into the lucrative jewelry business. Now women wanting to mark their breastfeeding journey are buying breast milk jewelry of all shapes, designs, and forms—including rings.
A breast milk ring is a type of ring with breast milk as the accent stone or centerpiece. Moms are purchasing them as a means to remember their breastfeeding days and the ups and downs that came along with them. An eternity ring of sorts like the one in this Zales review.
Motherhood is a unique and often difficult-to-explain experience. Some Moms want to capture that experience in several ways, e.g., tattoos, customer jewelry, and the like. Lately, breast milk rings have taken the center stage.
If done well, they can look dainty like an opal. There are several jewelry shops carrying breast milk jewelry. Just let your fingers do a little walking on Google.
Or if you are adventurous and have the time to tweak things, you can make your own.
Here’s the simples way to go about it.
How to Make Breast Milk Ring
Making your own breast milk ring isn’t as daunting as it seems. Many Moms have tried it, and so can you. You can even make it as a hobby/business once you gain the skills of a pro.
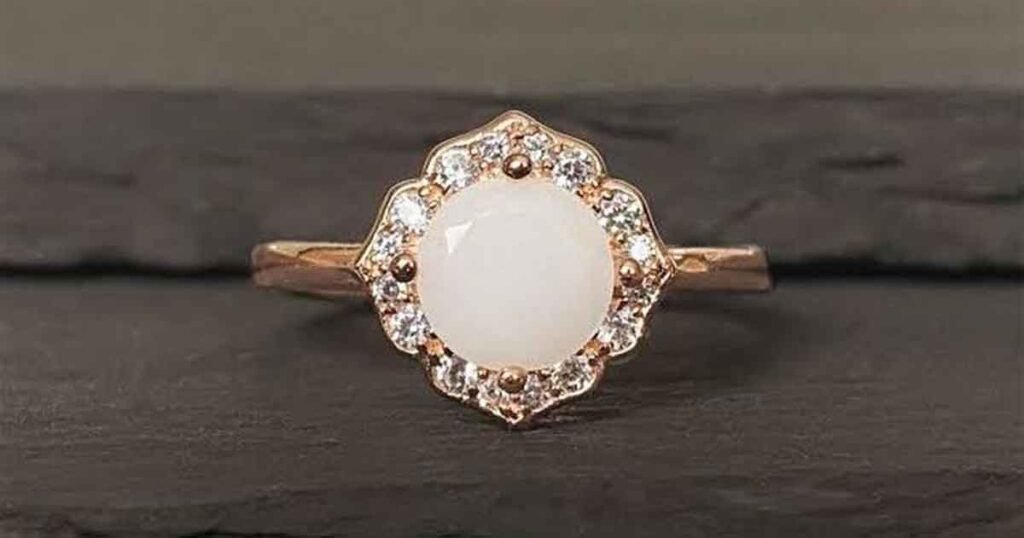
Just follow these steps:
Step 1
Buy all the jewelry making DIY things you need to do the job. You can buy them either from Etsy or Amazon. Things you need are:
- Breast milk preservation kit
- Galler Bezel Keepsake Silver Ring Kit (or any add-on you may need)
- Silicon mood mold (this has three options available. Inquire which best suits your needs)
- Custom wire wrapping
Step 2
Pump or press your own breast milk and preserve it. Just follow the steps outlined in the Preservation and Powdering sections.
Step 3
Mix preserved milk powder, resin, and hardener. If you haven’t had any experience in handling epoxies, this can be a little tricky.
Start by mixing two parts of resin with one part hardener (depends on how many pieces you plan to make). Then add a pinch of breast milk powder and mix them thoroughly. Remember that this is your first try and you may not get it right the first time.
Step 4
When you are satisfied with the appearance of the mixture, pour it into the mold, skimming off any sign of bubbles.
Then allow it to harden overnight.
Step 5
The next day, remove your stone from the mold and, with a little pressure, gently push it into its setting. Then simply press the prongs down with the back of a spoon
Voila! You have made your first breast jewelry ring.
Making a ring from start to finish takes between four to 14 days—depending on some factors like your skill level and the materials used.

And how long does breast milk jewelry last? Breast milk is solid, hence it can last a long time depending on the care you put into it.
The jewelry items in a typical woman’s jewelry box have meaningful stories to tell. Some stories are not as significant as others. Some very special items have unforgettable stories to tell. But none of them could bring a rush of mixed memories than one or two breast milk jewelry. They tell an epic story of how a Mom breastfed her child the moment he/she was born until old enough to hold a feeding bottle.
Isn’t this reason good enough for you to have one?
If you liked this post, you should check out our article, “Jewelry Styles Throughout History 2021 Update,” where you can learn more jewelry history.
